
iBike PDF User Guide
NEWTON QUICK SETUP GUIDE
(For details, watch YouTube videos and see additional instructions in box)
1) CHARGE NEWTON BATTERY
• Attach cable to Newton and USB charger or computer. Charge for minimum of 2 hours.
2) INSTALL SENSORS & MAGNETS, OR PAIR OTHERS http://youtu.be/_qHw1lln_vc
• Boxed ANT + speed / cadence sensor has been paired with your unit.
• Sensor instructions included separately. Note that magnets must pass within 1-2 coin widths of each probe.
• To pair with other ANT + sensors, awaken them (spin crank and wheel). Then, press-hold the Newton's top
and bottom arrows simultaneously until "SCAN" appears. Release arrows; pairing will happen automatically.
3) ATTACH DUAL MOUNT TO HANDLEBAR / STEM http://youtu.be/F_08DUfN4_I
• Printed installation instructions included separately
• DO NOT OVERTIGHTEN bolts: Tighten only until the mount sits securely.
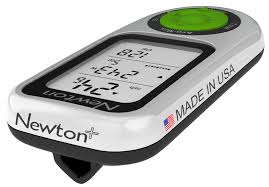
4) ATTACH NEWTON TO MOUNT
• Slide Newton on the mount's metal bracket. Secure Newton to mount by pushing up and screwing in metal bolt
5) SENSOR CHECK • Click any button to wake-up your Newton, then click the center button until "Cal" appears in the bottom
window of the display "---- W" appears in the middle window of the display.
• Spin the crank and rear wheel. When magnets and sensors are properly located you'll see:
o Speed in top window
o RPM in bottom window
6) CALIBRATION RIDE
• During the first five minutes of your first ride, "--- W" and "Cal" flash while Newton self-calibrates
• After calibration is completed, power numbers (in watts) are displayed in the middle window
• Click center button to alternate between bike computer and power meter
7) OPTIONAL ADVANCED CALIBRATION
• Users can explore the Newton's advanced calibration options inside ISAAC PC / Mac for further accuracy.
DETAILED NEWTON INSTRUCTIONS, INCLUDING "TROUBLESHOOTING" AND "FAQ" ARE
LOCATED IN THE HELP MENU OF ISAAC SOFTWARE